
How to Fix a Broken Sink Stopper: Replacing the Pivot Rod and Lever
Fix a broken sink stopper fast with this DIY sink plug lever replacement guide for pivot rod and lift rod repairs.

Why a Broken Sink Plug Lever Is More Than Just an Annoyance
Sink plug lever replacement is one of the most common bathroom plumbing repairs homeowners and property managers face. The good news: you can usually fix it yourself in under an hour, without calling a plumber.
Quick answer — how to replace a sink plug lever:
- Clear out under the sink and place a bucket below the P-trap
- Squeeze the spring clip and pull out the pivot rod
- Lift the stopper out from above
- Disconnect the clevis strap from the lift rod
- Insert the new pivot rod and stopper
- Reconnect the clevis strap and adjust for smooth open/close action
- Test for leaks and proper stopper travel
The typical repair takes 30–60 minutes and costs $10–$50 in parts.
That said, if the mechanism has been neglected for years — or if you manage multiple units — it helps to understand why it fails and exactly how to fix it right the first time.
I'm Jacob Reese, Vice President at Standard Plumbing Supply in Salt Lake City, and through years of working with contractors and property managers on wholesale plumbing supply, I've seen sink plug lever replacement come up again and again as a repair that gets put off longer than it should. In this guide, I'll walk you through everything you need to diagnose the problem, pick the right parts, and get it done cleanly.
Understanding the Pop-Up Drain Mechanism
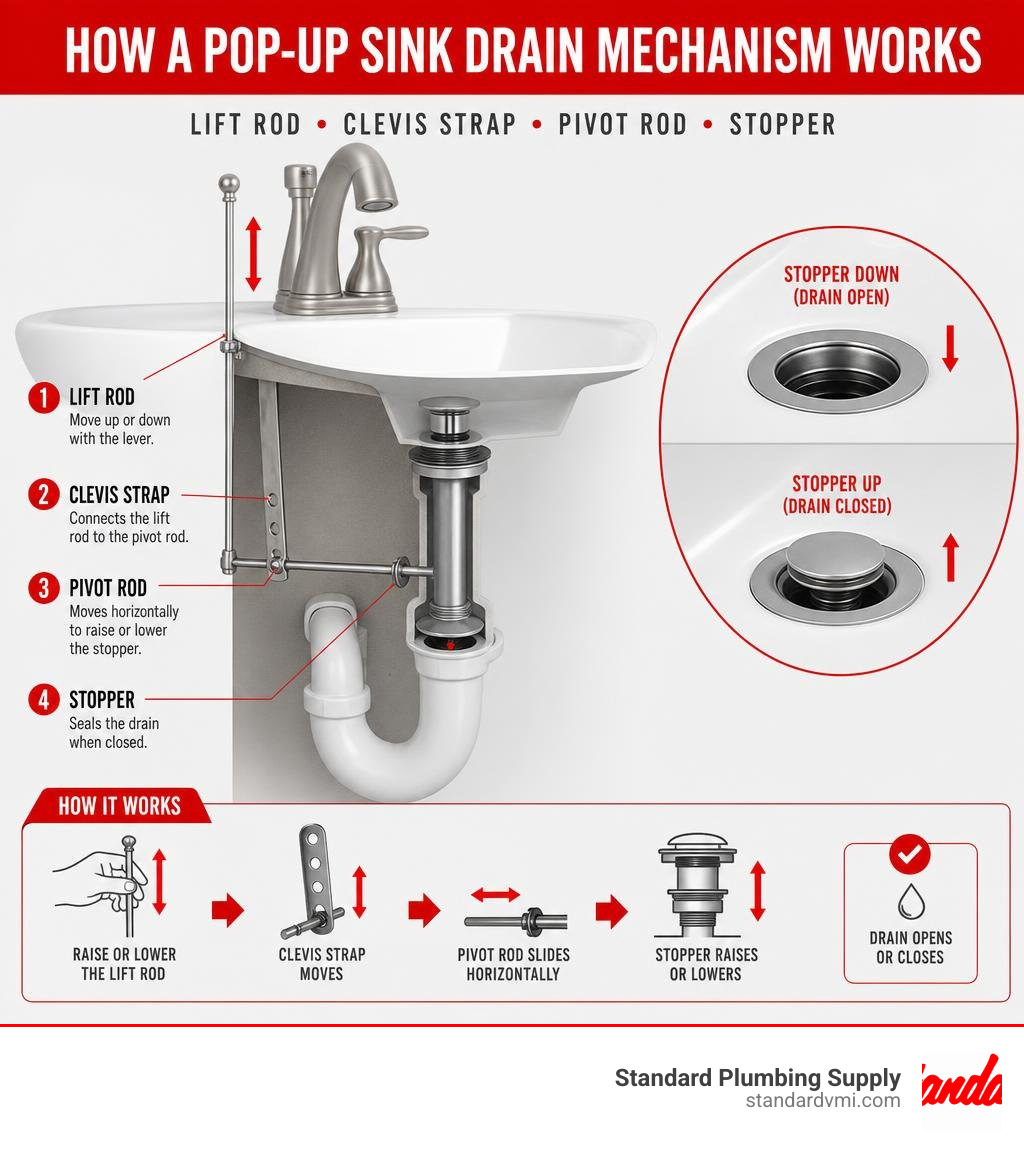
To successfully complete a sink plug lever replacement, it is essential to understand the mechanical anatomy hidden beneath your bathroom basin. Most standard bathroom sinks utilize a mechanical pop-up drain assembly. This clever setup translates the vertical motion of a lift rod above the sink into the horizontal movement of a pivot rod beneath the sink, which ultimately raises or lowers the stopper.
Let's break down the primary components of this system:
- Lift Rod: This is the vertical metal rod that sits directly behind your sink faucet. When you pull up or push down on this rod, you initiate the entire drain-closing sequence.
- Clevis Strap (or Lift Rod Strap): This is a flat, perforated metal strap featuring five to eight adjustment holes. It connects directly to the bottom of the lift rod and is secured using a clevis screw.
- Pivot Rod (or Ball Rod): This horizontal metal rod penetrates the side of the drain tailpiece. It features a plastic or metal ball in the middle that acts as a fulcrum, allowing the rod to tilt up and down. The tip of the pivot rod sits inside the drain body and hooks into or pushes against the bottom of the stopper.
- Spring Clip: A small, double-looped metal clip that slides onto the pivot rod. It pinches the clevis strap to hold the pivot rod securely in place at the desired adjustment hole.
- Stopper (or Plunger): The visible plug inside your sink basin that seals the water in or lets it drain out.
To see how these parts interact during daily use, you can read more about How the mechanism works.
Pop-Up Drain Components and Their Functions
| Component | Primary Material | Location | Function | Common Failure Mode |
|---|---|---|---|---|
| Lift Rod | Brass, Steel, or Plastic | Above/Behind Faucet | Initiates the opening and closing action | Bends or slips out of the clevis strap |
| Clevis Strap | Perforated Metal | Directly under the basin | Provides adjustable linkage holes | Stripped adjustment screw or rust |
| Pivot Rod | Steel or Brass | Inside drain tailpiece | Tilts on a ball joint to lift/lower stopper | Snap/breakage at the tip due to corrosion |
| Spring Clip | Spring Steel | On the pivot rod | Locks the clevis strap to the pivot rod | Rusts out or loses tension |
| Stopper | Chrome/Brass/Plastic | Inside the sink drain | Seals or opens the drain opening | Hair clog buildup or broken bottom loop |
Signs You Need a Sink Plug Lever Replacement
Over time, water, soap scum, hair, and harsh chemical drain cleaners take a heavy toll on the components hidden beneath your sink. Because these metal parts are constantly subjected to moisture and organic waste, they are highly susceptible to corrosion.
Here are the most common signs that your sink stopper lever mechanism is failing and requires attention:
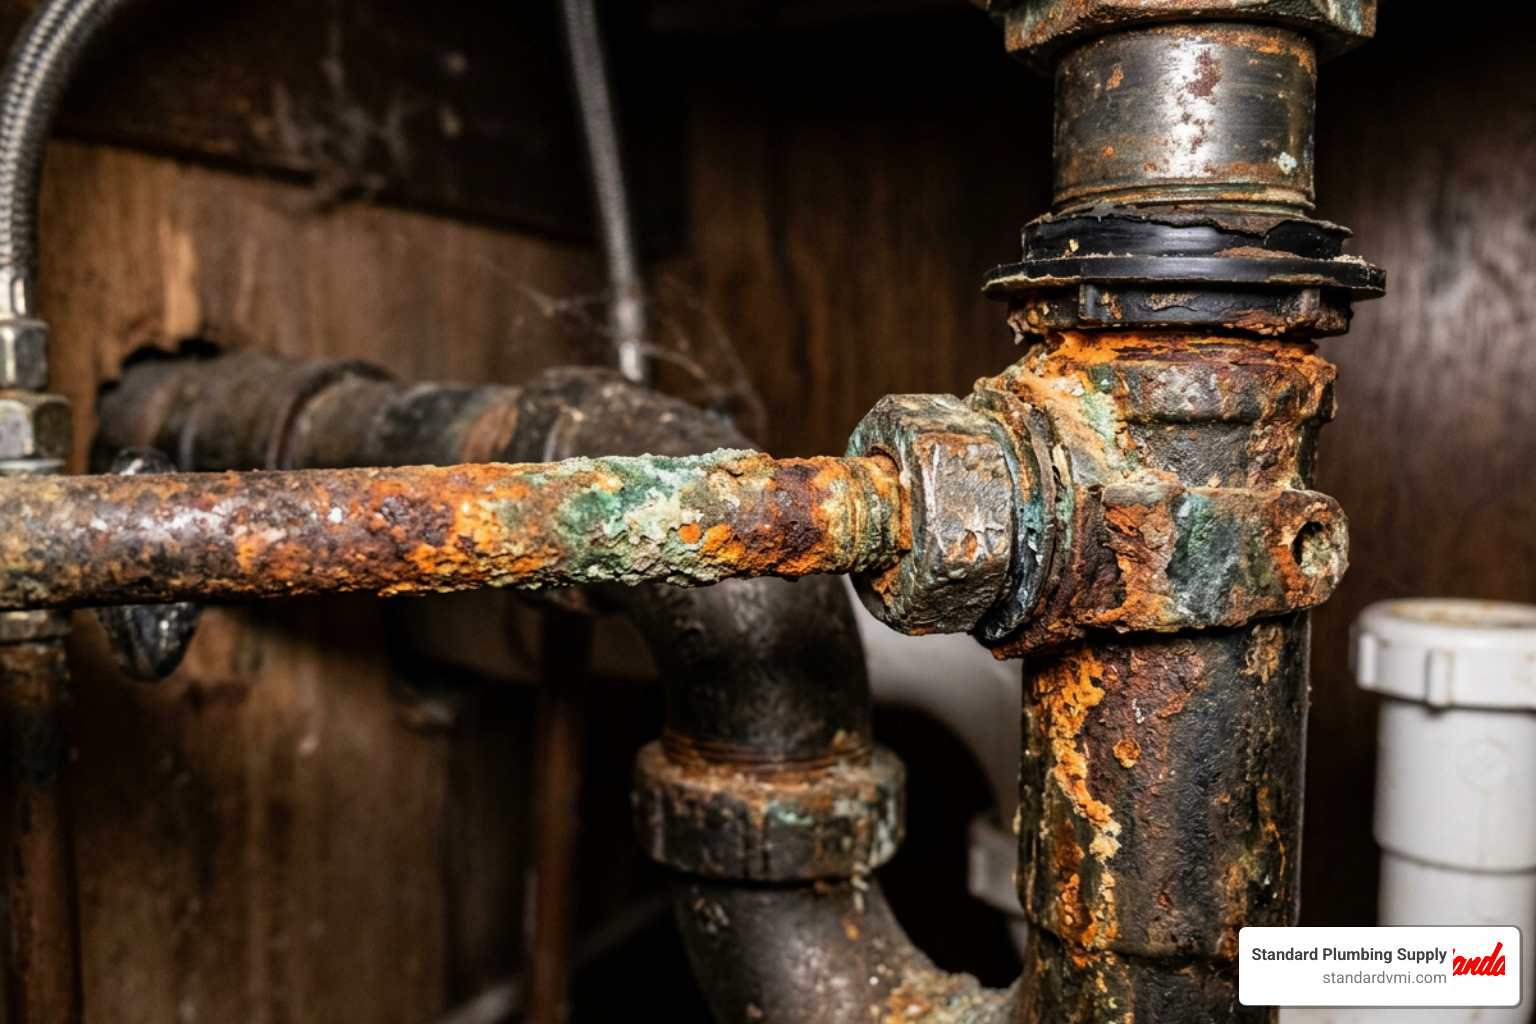
- Corrosion and Rust: If you look beneath your sink and notice green scale (copper oxidation) or orange rust flaking off the horizontal rod, the metal is structurally compromised. Eventually, this corrosion will eat through the rod entirely.
- A Broken Pivot Rod: This is the ultimate failure point. The tip of the rod that extends inside the drain to hold the stopper can rust and snap off. When this happens, pulling the lift rod above the sink will do absolutely nothing because the physical connection to the stopper is gone.
- A Stuck Stopper: If your stopper is permanently stuck in the open or closed position, the pivot rod may have slipped out of its connection point, or the linkage has become so misaligned that it can no longer move.
- Slow Drainage: While slow drainage is often caused by hair and soap scum buildup, a bent or improperly adjusted horizontal rod can prevent the stopper from lifting high enough to allow water to drain quickly.
If you are dealing with a stopper that won't budge, you can find helpful troubleshooting tips in this guide on How to diagnose a stuck stopper.
Tools and Materials Needed for the Job
Before you begin your sink plug lever replacement, gathering the correct tools and replacement parts will save you mid-project trips to our stores. Fortunately, this job requires only basic household tools.
Required Tools
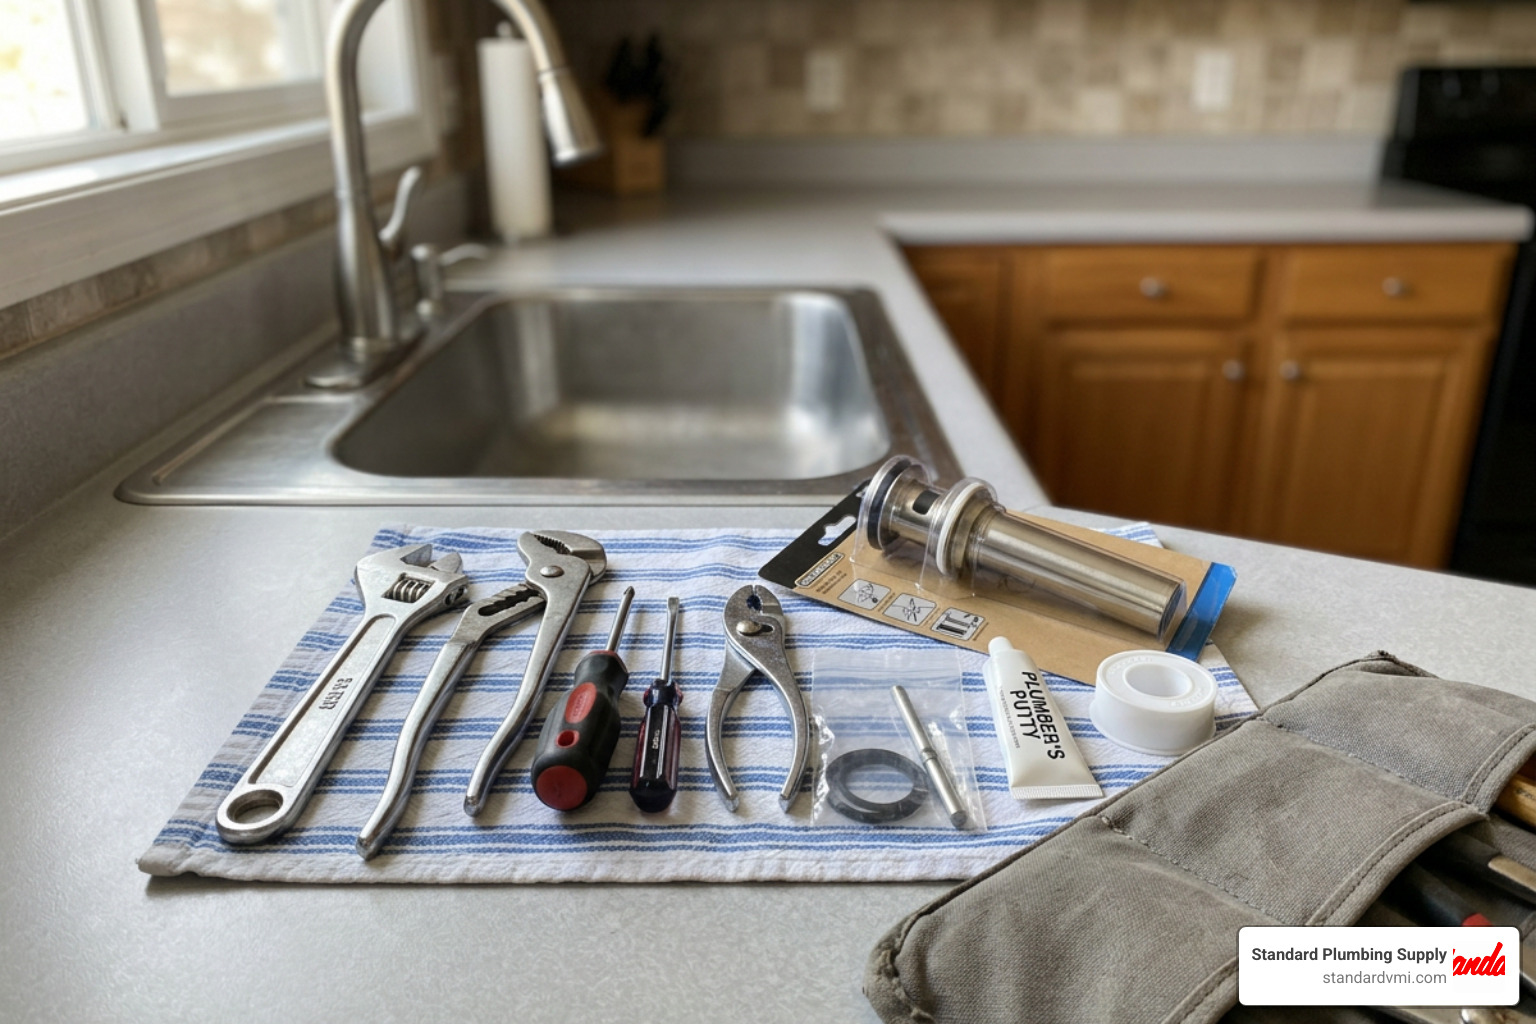
- Channel-lock pliers or an adjustable wrench: Essential for loosening the pivot rod retaining nut and the P-trap slip joints if necessary.
- A bucket or small basin: To catch any residual water trapped inside the drain line and P-trap.
- A clean rag or cloth: For cleaning up threads and keeping your workspace dry.
- Silicone grease or plumber's tape: Applied to the threads and gaskets to ensure a smooth, leak-free seal.
Highly-Rated Replacement Parts
When purchasing replacement parts, we recommend opting for trusted brands that offer high durability. Some of the most popular and reliable products include:
- PF WaterWorks PF0907 Pop-Up Drain Repair Kit: A highly popular universal choice with over 1,748 customer reviews and more than 500 units bought in the past month.
- Moen 11985 Replacement Bathroom Sink Pivot Rod: A premium, durable replacement rod boasting over 4,036 customer reviews.
- Symmons P-112N Replacement Pop-Up Drain Rod Assembly: Another highly reliable choice with over 1,255 customer reviews.
- Prime-Line MP53280 Joint Rod: A reliable utility option with more than 300 units purchased in the past month.
Step-by-Step Guide to Replacing the Pivot Rod and Lever
Let's walk through the exact process of removing your old, broken hardware and installing your fresh parts.
To help visualize how the internal components fit together before you start unscrewing parts, you can watch this helpful Video tutorial on replacing the ball rod.
Preparing for the Sink Plug Lever Replacement
Before you touch any plumbing connections, take a few minutes to set up a clean, safe workspace.
- Clear the Cabinet: Remove all cleaning supplies, toiletries, and storage bins from beneath your sink. You will need plenty of room to work comfortably.
- Turn Off the Water Supply: While you won't be cutting into pressurized water lines, it is always a smart safety precaution to shut off the hot and cold water valves under the sink to prevent accidental spills.
- Place Your Bucket: Position your bucket directly beneath the P-trap and the drain tailpiece. There will always be water sitting in the P-trap, and disconnecting the pivot rod will release a small amount of trapped water.
- Disconnect the P-Trap (Optional but Recommended): If your sink cabinet is tight, loosening the slip-joint nuts on your P-trap and removing it entirely will give you much better access to the drain tailpiece.
For more preparation tips, check out this Easy DIY guide for lever waste drain kits.
Installing the New Sink Plug Lever Replacement Parts
Now that your workspace is prepped, follow this step-by-step workflow to complete the replacement:
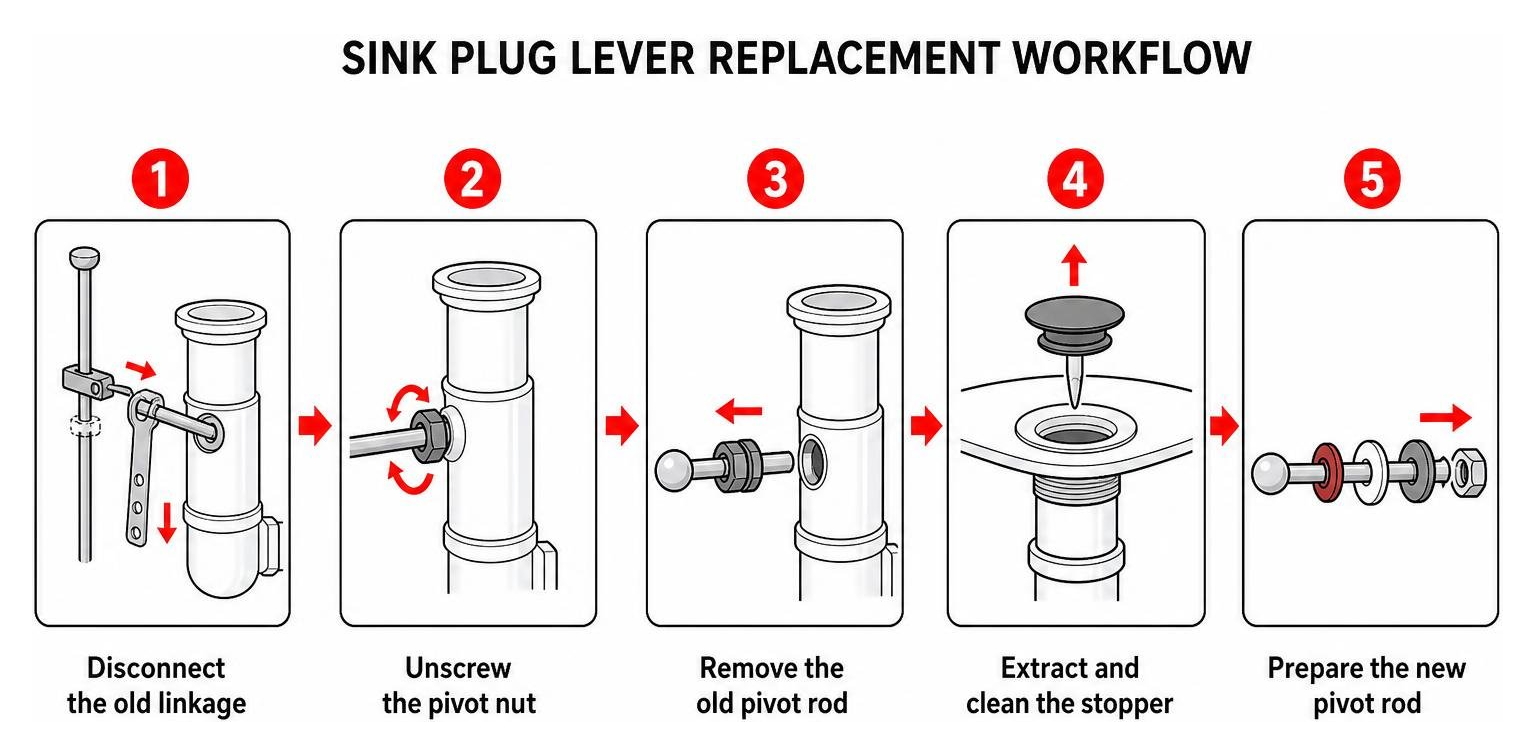
- Disconnect the Old Linkage: Locate the clevis strap hanging down from the lift rod. Squeeze the spring clip and slide it off the horizontal pivot rod. Loosen the clevis screw and slide the clevis strap off the lift rod.
- Unscrew the Pivot Nut: Locate the retaining nut on the side of the drain tailpiece where the pivot rod enters. Use your pliers or adjustable wrench to unscrew this nut.
- Remove the Old Pivot Rod: Pull the pivot rod straight out of the tailpiece. Note how the rubber gasket, plastic ball, and washers are arranged on the rod.
- Extract and Clean the Stopper: From above the sink, lift the stopper straight out of the drain. If it was hooked to the rod, you may need to wiggle it. Clean off any accumulated hair, soap scum, and grime using an old rag.
- Prepare the New Pivot Rod: Slide the plastic ball, seat washers, and retaining nut onto your new pivot rod according to the manufacturer's instructions. Apply a pea-sized dab of silicone grease to the ball joint and gaskets to ensure smooth, squeak-free operation.
- Insert the Stopper and New Rod: Drop the stopper back into the drain from above. Orient the loop at the bottom of the stopper so it faces the back wall. From below, slide the new pivot rod into the tailpiece opening, ensuring the tip hooks securely into the stopper's bottom loop.
- Tighten the Pivot Nut: Hand-tighten the retaining nut back onto the tailpiece threads, then give it a quarter-turn with your pliers. Crucial tip: Do not overtighten this nut, as doing so will crush the ball joint gasket and make the lift rod incredibly stiff and difficult to pull.
- Reconnect and Adjust the Linkage: Slide the spring clip and clevis strap onto the new pivot rod. Connect the top of the clevis strap back to the lift rod and tighten the clevis screw. Test the travel of the stopper by pulling the lift rod up and down. If the stopper doesn't close fully, squeeze the spring clip and move the pivot rod to a different hole on the clevis strap.
- Run a Leak Test: Turn your water supply back on, fill the sink basin, and release the water. Watch the retaining nut and tailpiece closely for any signs of dripping. If a minor leak occurs, slightly tighten the pivot nut or add a wrap of plumber's tape to the threads.
For older bathtubs and complex trip-lever configurations, you can also learn How to adjust trip-lever linkages.
Frequently Asked Questions about Sink Stopper Repair
Can I repair a broken pivot rod without replacing it?
If the tip of your pivot rod has snapped off but you have some extra length to spare, it is sometimes possible to perform a temporary DIY fix. By using a hammer to carefully slide the plastic ball further down the metal rod toward the broken end, you can gain an extra half-inch of reach to re-engage the stopper loop.
However, this is strictly a temporary, stop-gap solution. Once the metal of a pivot rod has corroded enough to break, the remaining portion of the rod is already highly compromised and will likely snap again soon. A complete sink plug lever replacement using a fresh, corrosion-resistant rod is always the safest and most reliable long-term fix.
Are sink stopper levers universal?
Yes and no. While many modern pop-up drain repair kits are marketed as "universal," bathroom sink drains in the United States typically come in two standard sizes: 1-1/4 inches (the most common size for residential bathroom sinks) and 1-1/2 inches (often found in larger commercial basins or utility sinks).
Additionally, the length of the horizontal pivot rod can vary depending on the distance between your drain pipe and your faucet's lift rod. When shopping for replacement parts, it is always safest to bring your old pivot rod and ball joint into one of our Standard Plumbing Supply locations so our team can help you match the length, ball diameter, and thread size perfectly.
When should I call a professional plumber?
While a sink plug lever replacement is a very straightforward DIY project, there are a few situations where it is best to call in a professional:
- Severely Corroded Pipes: If your drain pipes or P-trap are made of old metal and crumble or crack when you attempt to loosen the slip joints.
- Persistent Leaks: If you have replaced the gaskets, applied plumber's tape, and tightened the connections, but water continues to slow-drip behind your cabinet walls.
- Stripped or Seized Parts: If the retaining nut on your tailpiece is completely rusted solid and won't budge even with penetrating oil.
If you are located in Davis County or the surrounding areas and prefer to leave the job to a local expert, you can reach out to trusted local service providers like those offering Professional plumbing services in Woods Cross.
Conclusion
A sticky, broken, or leaking bathroom sink stopper doesn't have to disrupt your week. With a basic set of pliers, a bucket, and a high-quality replacement kit, you can complete a professional-grade sink plug lever replacement in less than an hour.
At Standard Plumbing Supply, we are proud to serve homeowners, DIYers, and professional contractors across Utah, Idaho, Wyoming, Colorado, Nevada, Oregon, California, Arizona, and Nebraska. Whether you need a single replacement pivot rod or a complete VMI (Vendor Managed Inventory) solution to keep your multi-family maintenance shop stocked with the industry's most trusted brands, we have you covered.
Have questions about choosing the right replacement parts for your faucet model? Contact our team for professional assistance or visit one of our local branch counters today!